Hello and welcome to my blog. I’ve been woodworking for a couple of years now, and lately I’ve been thinking that it might be a good time to start documenting what I’m up to. Beyond that, I’m still not sure what I want this blog to be exactly, but we’ll see how it goes. Currently I am building my new workbench, and since the workbench is the heart of a wood shop, I figure it’s as good a place as any to begin.
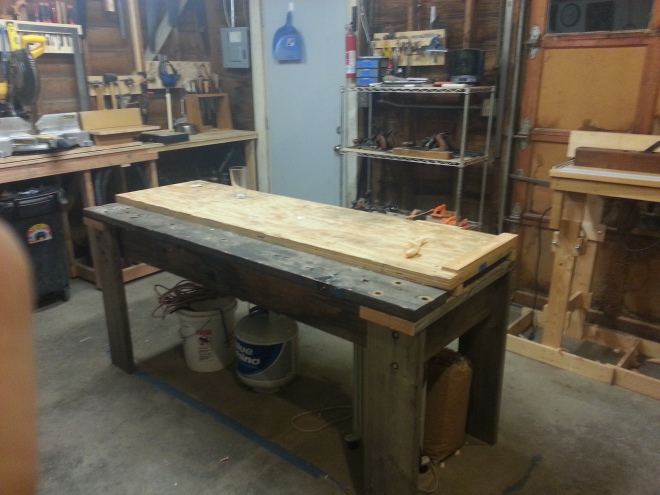
Above is the bench I began woodworking with and have used for several years…it’s a rather strange affair. It was originally constructed to be a sort of shave horse for making archery bows. The weathered douglas fir boards are what remains of the original bench. The upper beam was to be the surface of the shave horse. A couple of years ago, as I got more into furniture work, I added the plywood top onto one side of the bench, and cut off about half of the width (it was originally 4′ wide, pretty ridiculous for a woodworking bench).
With the plywood top it was a serviceable bench, but it was not particularly flat, and the whole affair was somewhat wobbly, being held together with lag screws. I did like that I had no reservations about screwing things directly into the top (planing stops, etc.). And, I admit that with some modifications to make the structure more rigid, and some flattening of the top, it could be a very good bench. But for whatever reason, I want something a bit nicer.
I actually began work on my new bench almost two years ago. I selected a roubo design, pretty much bog standard for fine woodworking benches these days. The massive proportions of the components is appealing to me. I had bought douglas fir 2×12 construction lumber from Lowe’s. I ripped it into rough widths with a circular saw, then stacked and stickered the parts and left it to dry inside my house for a couple of months (construction lumber is sold at ~19% MC, and still has a lot of drying left to do once you pull it off the rack).
I got as far as laminating the legs and stretchers of the undercarriage, and milling those parts down. I even laid out the mortises. But then I got sidetracked with other projects, and since the existing bench was serviceable, I left the milled components of this new bench in my wood rack for a couple of years. But it will wait no longer.
With such a long hiatus, I didn’t really recall the exact design I had in mind back then. So I have decided to re-mill the parts, getting rid of all existing pencil and knife marks.
I re-designed the bench in CAD and printed out some plans as a guide.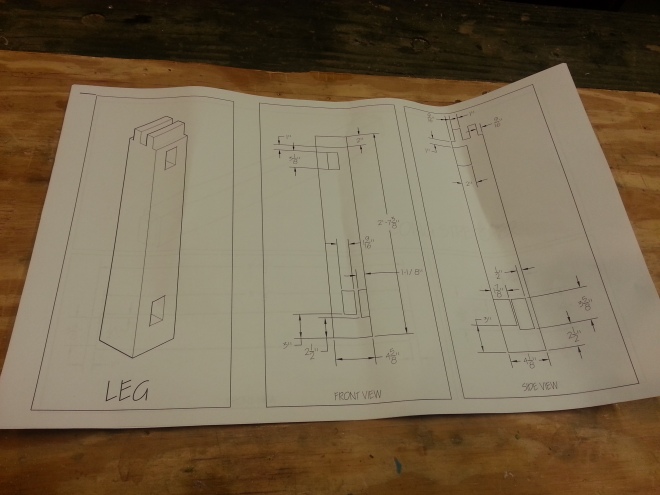
Apparently I had knifed my lines pretty deeply, so I needed to remove about 1/8″ of material from the width and thickness of each member, and about 1/2″ from each length.
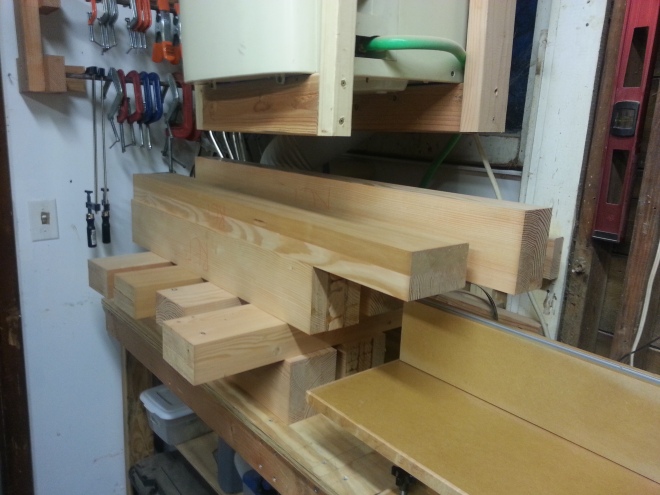 Above is the pile of legs and stretchers after hand planing two reference surfaces for each. I had to remove almost 1/16″ to get past the existing knife marks. I use a couple of vintage jointer planes for this task. The reference surfaces are adjacent faces, and they are checked for flat, wind, and square. Once they are good in those aspects, I can feed them through my lunchbox planer to get the other two faces parallel to the hand-planed faces, and dial in my thickness.
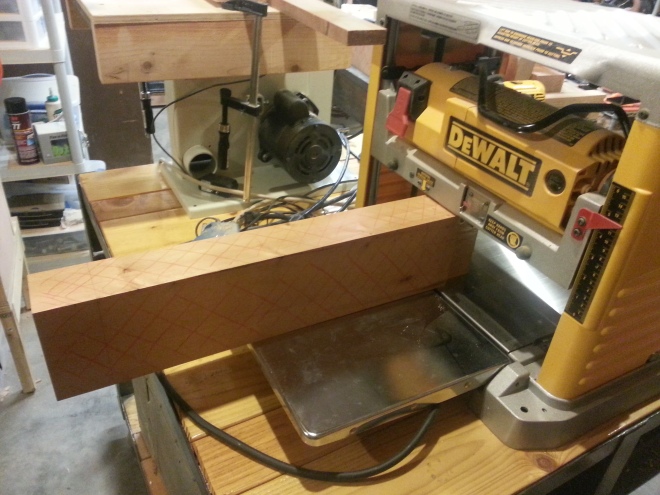 It is nice to use the power planer after hand-planing the reference surfaces! I don’t have a jointer, which is why I use the hand planes for flattening. I do enjoy the hand flattening, and don’t feel particularly compelled to buy a powered jointer, but it’s nice not to have to also thickness by hand on components of this size.
One thing my shop is severely lacking is dust collection of any kind. As useful as the planer is, it makes a hell of a mess.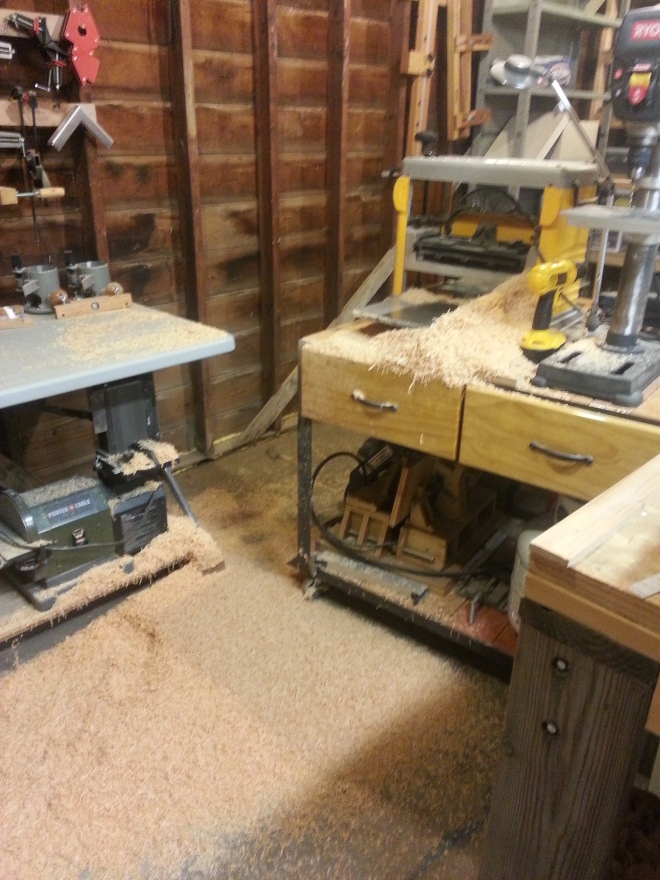 So currently some of the time saved by using a power planer is eaten up by cleaning all of these chips. I will be moving in a few months and don’t have time to set up a dust collection system, so for now, this is just how it is.
Anyways, after cleaning up, I use the miter saw to get the parts to length. First, I slice off a tiny amount on one end to get a flat, square reference surface. Then, I mark a line for the final length, set up a stop block, and cut the parts.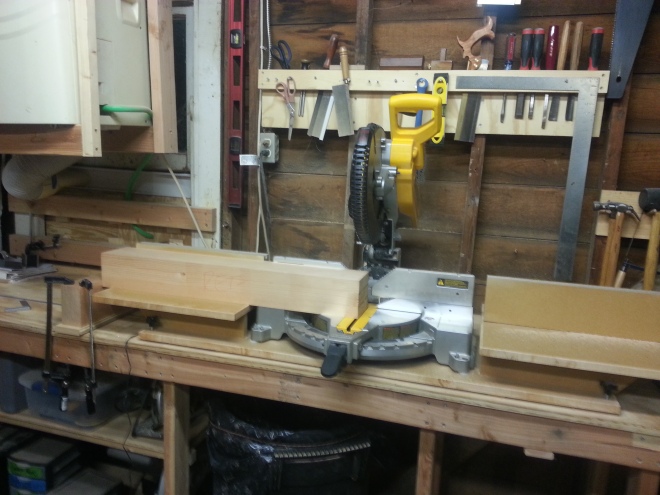 That goes pretty quickly, and after cleaning up I’m left with a nice stack of 6-square parts:
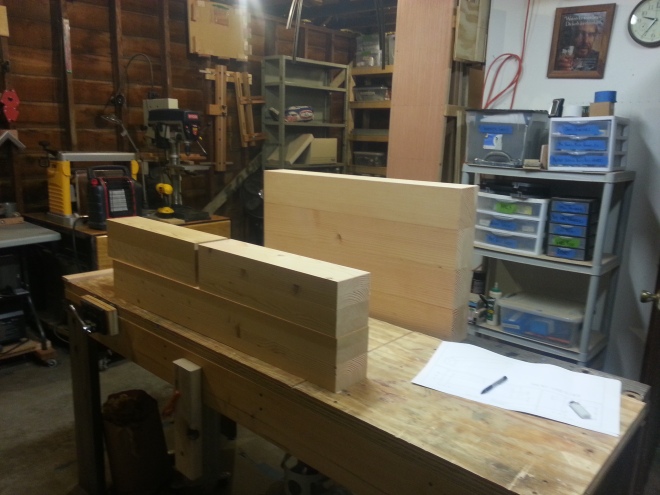
That seems like a good place to stop for the night. I’m ready to mark out and cut the mortises, and that’s what you’ll see on the next blog post.
Thanks for reading.

Hi,
discovered your blog today. Nice workbench project.
I had a similar way with my bench even if I’m doing a completely different design.
Cheers,
Stefan
LikeLike
Thanks, Stefan. Yeah, I see there’s much laminating of construction lumber on your bench, too 🙂
I am looking forward to seeing your Shaker-style bench complete with all of the cabinets.
Thanks for commenting!
LikeLike